Use ngrok's Global Server Load Balancing with Linode
To use ngrok's Global Server Load Balancing with Linode:
- Reserve your ngrok domain
- Create your ngrok Edge
- Create Tunnel Group backends for your VMs
- Create a Weighted Backend and Route on your Edge
- Install the ngrok agent and an example workload on each VM
- Test out ngrok's Global Server Load Balancing
- (optional) Enable the Traffic Policy module for API gateway features
In this guide, you'll learn how to layer ngrok's Global Server Load Balancing (GSLB) on top of a VM-based deployment on Linode.
GLSB improves the performance and resiliency for your apps by distributing traffic to the nearest Point of Prescence (PoP) and the upstream service. Unlike a traditional GSLB deployment, ngrok automatically routes traffic without requiring you to deploy new infrastructure, provision IPs, or change DNS records. All you have to do is configure your ngrok agents for a simple path to high availability, horizontal scaling, A/B testing, and more.
ngrok's GSLB even works on top of Linode's internal load balancing mechanism, NodeBalancer, for additional global resiliency and latency improvements.
- An ngrok account.
- An account with Linode.
- Three Ubuntu 24.04 virtual machines (VMs) in three globally-distributed regions (e.g. Atlanta, Osaka, and Frankfurt):
- Hostnames should be unique, ideally using the location of the datacenter (e.g.
atlanta,osaka, andfrankfurt). - Docker and Docker Compose installed on each VM.
- Hostnames should be unique, ideally using the location of the datacenter (e.g.
Step 1: Reserve your ngrok domain
Your first task is to generate a new API key in the ngrok dashboard. Make sure you save the API key before you close the modal, because it won't be displayed again.
To simplify authenticating your account with the ngrok API, export the API key on your local workstation.
export NGROK_API_KEY=<YOUR-API-KEY>
Next, you need to reserve your subdomain with an ngrok-managed domain like .ngrok.app, .ngrok.dev, .ngrok.pro, or even .ngrok.pizza. For an example deployment like this, YOUR_COMPANY-linode-gslb.ngrok.app would work great.
You can reserve your domain in one of two ways: with the ngrok API, or in the ngrok dashboard.
With the ngrok API, reserve your domain on the /reserved_domains endpoint using the NGROK_API_KEY and NGROK_DOMAIN variables you exported.
curl \
  -X POST https://api.ngrok.com/reserved_domains \
  -H "Authorization: Bearer ${NGROK_API_KEY}" \
  -H "Content-Type: application/json" \
  -H "Ngrok-Version: 2" \
  -d '{"description":"Linode Load Balancing","domain":"'${NGROK_DOMAIN}'"}'
Export a variable for your new domain, which will be used in following API calls.
export NGROK_DOMAIN=<YOUR-NGROK-DOMAIN>
Using CNAMEs, ngrok can host an endpoint on your dowmain while also managing the complete TLS certificate lifecycle on your behalf. If you'd prefer to use a custom domain rather than an ngrok-managed one, follow our guide to set up your DNS and replace your custom domain in the export command above.
Step 2: Create your ngrok Edge
With ngrok, you can manage multiple endpoints, such as domains or routes, using a single Edge configuration in the cloud. Edges let you update endpoints without taking them offline, connect multiple ngrok agents to a single endpoint, apply modules like OAuth or IP restrictions, and balance the load between your upstream services.
Send a POST request to the /edges/https endpoint, replacing the description field below as needed.
curl \
  -X POST https://api.ngrok.com/edges/https \
  -H "Authorization: Bearer ${NGROK_API_KEY}" \
  -H "Content-Type: application/json" \
  -H "Ngrok-Version: 2" \
  -d '{"description":"Linode HTTPS Edge","hostports":["'${NGROK_DOMAIN}':443"]}'
Export the id in this response, which begins with edghts_..., for future use.
export EDGE_ID=edghts_...
Step 3: Create Tunnel Group backends for your VMs
Next, create a Tunnel Group for each of your globally-distributed VMs. A Tunnel Group uses one or more labels to identify which agent-created tunnels it should attach to a given Edge and route, which you'll create in a moment.
You'll need to run the API request to the /backends/tunnel_group endpoint for each of your VMs, changing the <LOCATION_NAME> with the name of the city or region of the data center where they're deployed (e.g. atlanta, osaka, and frankfurt).
curl \
  -X POST https://api.ngrok.com/backends/tunnel_group \
  -H "Authorization: Bearer ${NGROK_API_KEY}" \
  -H "Content-Type: application/json" \
  -H "Ngrok-Version: 2" \
  -d '{"labels":{"dc":"<LOCATION_NAME>"}}'
Export the id, beginning with bkdtg_..., returned from the ngrok API for each Tunnel Group you create.
export BACKEND_ID_01=bkdtg_...
export BACKEND_ID_02=bkdtg_...
export BACKEND_ID_03=bkdtg_...
Step 4: Create a Weighted Backend and Route on your Edge
With a Weighted Backend, you can specify custom weights for Tunnel Group backends, shaping precisely how to load-balance traffic across the infrastructure you've distributed around the globe. Without a Weighted Backend, the ngrok Edge and GSLB will always favor the Point of Presence (PoP) and VM nearest the user making requests.
Create a Weighted Backend at the /backends/weighted endpoint using your Tunnel Group backend ids exported from the previous step. The curl command below creates equal weighting for your backends, but you can use integers between 0-10000 to configure precise proportional weights.
curl \
	-X POST https://api.ngrok.com/backends/weighted \
	-H "Authorization: Bearer ${NGROK_API_KEY}" \
	-H "Content-Type: application/json" \
	-H "Ngrok-Version: 2" \
	-d '{"backends":{"'${BACKEND_ID_01}'":1,"'${BACKEND_ID_02}'":1,"'${BACKEND_ID_03}'":1}}'
Export the id of your new Weighted Backend.
export WEIGHTED_BACKEND_ID=bkdwd_...
You can now create an catch-all Edge Route at / using your Weighted Backend using the /edges/https/{EDGE_ID}/routes endpoint.
curl \
  -X POST "https://api.ngrok.com/edges/https/${EDGE_ID}/routes" \
  -H "Authorization: Bearer ${NGROK_API_KEY}" \
  -H "Content-Type: application/json" \
  -H "Ngrok-Version: 2" \
  -d '{"match":"/","match_type":"path_prefix","backend":{"enabled":true,"backend_id":"'${WEIGHTED_BACKEND_ID}'"}}' \
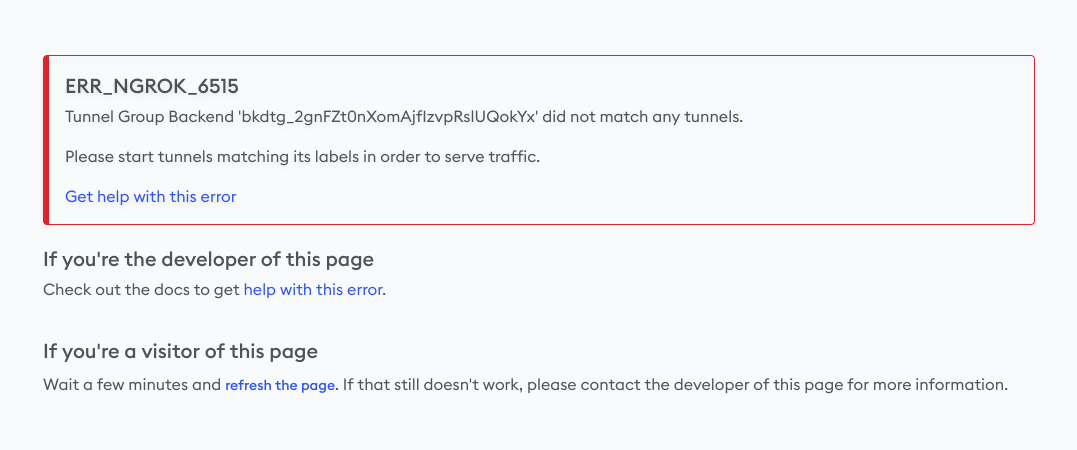
You now have an active domain, Edge, Tunnel Group backends, a Weighted Backend, and a route. If you open a new tab and navigate to https://<YOUR_NGROK_DOMAIN> right now, you'll see an error message from ngrok. You've successfully reserved a domain and created an edge, but don't yet have ngrok agents or active tunnels.
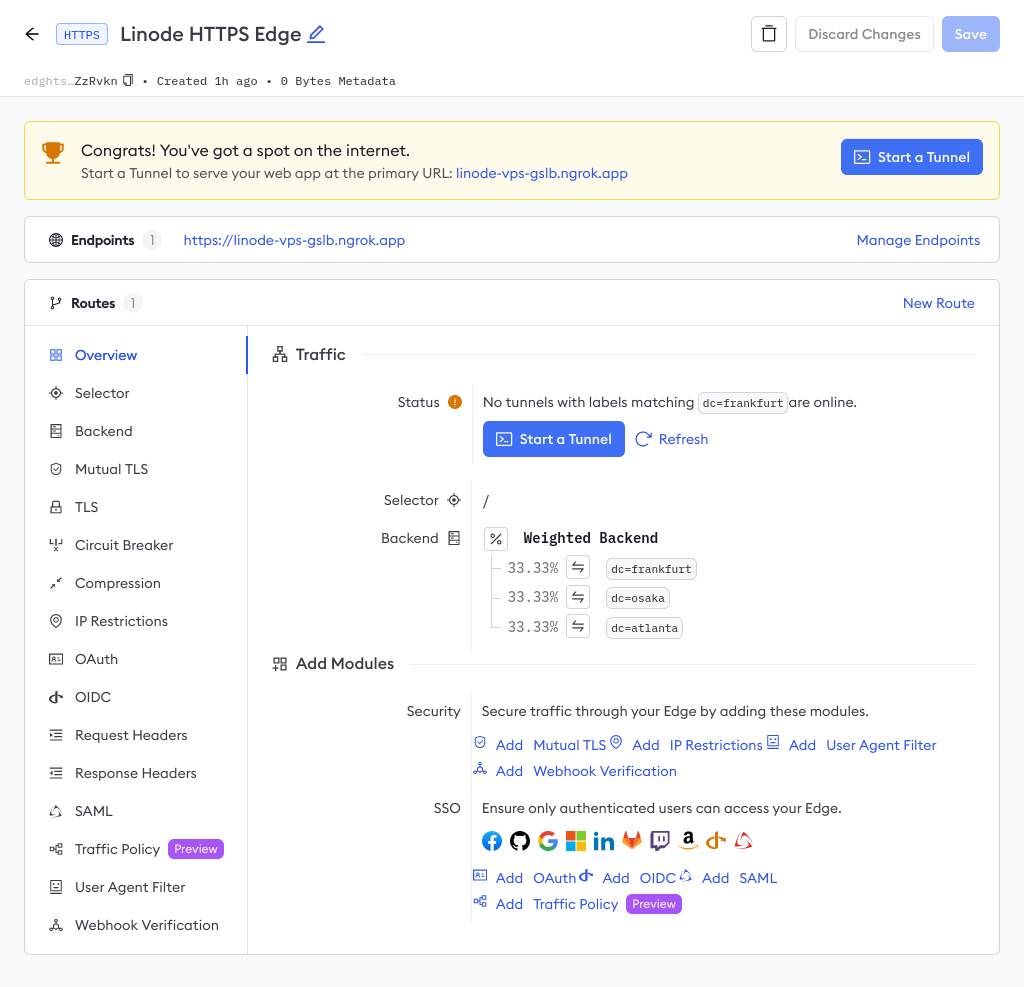
You can also navigate to the Edges dashboard to see your Edge configuration, on the domain you reserved, with no online tunnels.
Step 5: Install the ngrok agent and an example workload on each VM
To get some tunnels online and quickly see how ngrok's GSLB works, you'll use an example API deployment. This demo deployment has four parts:
- A straightforward Go-based API with a single endpoint at
/api, which returns a randomly generated UUID and the machine'shostname, which should reflect the regions of your VMs. - A
Dockerfilefor containerizing said Go-based API. - A
docker-compose.ymlfile for starting the API container and a containerized edition of the ngrok agent on the same network. - A
ngrok.ymlagent configuration file to connect the agent to your ngrok account and one of the Tunnel Group backends you previously created.
Repeat the following steps on each VM:
-
Clone the demo repository.
git clone https://github.com/joelhans/ngrok-vps-gslb-demo
cd ngrok-vps-gslb-demo -
Edit the
ngrok.ymlngrok agent configuration file with your<YOUR_NGROK_AUTHTOKEN>, which you can in the ngrok dashboard—note that it's different from the API key you created in the first step. Next, edit the<LOCATION_NAME>for that VM, matching the labels you created in step 3 (e.g.atlanta,osaka, andfrankfurt).version: 2
authtoken: <YOUR_NGROK_AUTHTOKEN>
log_level: debug
log: stdout
tunnels:
vps-demo:
addr: 5000
labels:
- dc=<LOCATION_NAME> -
Build and start the containerized API deployment, passing the hostname of the VM to the hostname of the Docker container.
HOSTNAME=$(hostname -f) docker compose up -d
Step 6: Test out ngrok's Global Server Load Balancing
ngrk is now load-balancing your single API endpoint across all three distributed VMs.
You can now ping your demo API at <YOUR_NGROK_DOMAIN>/api to see which backend responds.
curl ${NGROK_DOMAIN}/api
[{"id":"1cf26269-ce8b-4f16-91f1-fdf7bc6d9e80","dc":"atlanta"}]
To see the weighting in action, try a batch of curl requests.
for i in `seq 1 20`; do \
  curl  \
    -X GET "${NGROK_DOMAIN}/api" ; \
  done
You should see each VM respond with similar frequency:
[{"id":"c46bdbd9-b588-4ffa-8018-d299d0918bbc","dc":"osaka"}]
[{"id":"dce5a46e-15af-4479-a073-8fbc7f0097c5","dc":"atlanta"}]
[{"id":"ecc6451c-bc25-43bd-8cb6-a162f019adf3","dc":"frankfurt"}]
[{"id":"ecc6451c-bc25-43bd-8cb6-a162f019adf3","dc":"frankfurt"}]
[{"id":"ecc6451c-bc25-43bd-8cb6-a162f019adf3","dc":"frankfurt"}]
[{"id":"c46bdbd9-b588-4ffa-8018-d299d0918bbc","dc":"osaka"}]
[{"id":"c46bdbd9-b588-4ffa-8018-d299d0918bbc","dc":"osaka"}]
[{"id":"ecc6451c-bc25-43bd-8cb6-a162f019adf3","dc":"frankfurt"}]
[{"id":"ecc6451c-bc25-43bd-8cb6-a162f019adf3","dc":"frankfurt"}]
[{"id":"dce5a46e-15af-4479-a073-8fbc7f0097c5","dc":"atlanta"}]
[{"id":"ecc6451c-bc25-43bd-8cb6-a162f019adf3","dc":"frankfurt"}]
[{"id":"dce5a46e-15af-4479-a073-8fbc7f0097c5","dc":"atlanta"}]
[{"id":"dce5a46e-15af-4479-a073-8fbc7f0097c5","dc":"atlanta"}]
[{"id":"c46bdbd9-b588-4ffa-8018-d299d0918bbc","dc":"osaka"}]
[{"id":"ecc6451c-bc25-43bd-8cb6-a162f019adf3","dc":"frankfurt"}]
[{"id":"c46bdbd9-b588-4ffa-8018-d299d0918bbc","dc":"osaka"}]
[{"id":"c46bdbd9-b588-4ffa-8018-d299d0918bbc","dc":"osaka"}]
[{"id":"dce5a46e-15af-4479-a073-8fbc7f0097c5","dc":"atlanta"}]
[{"id":"ecc6451c-bc25-43bd-8cb6-a162f019adf3","dc":"frankfurt"}]
[{"id":"dce5a46e-15af-4479-a073-8fbc7f0097c5","dc":"atlanta"}]
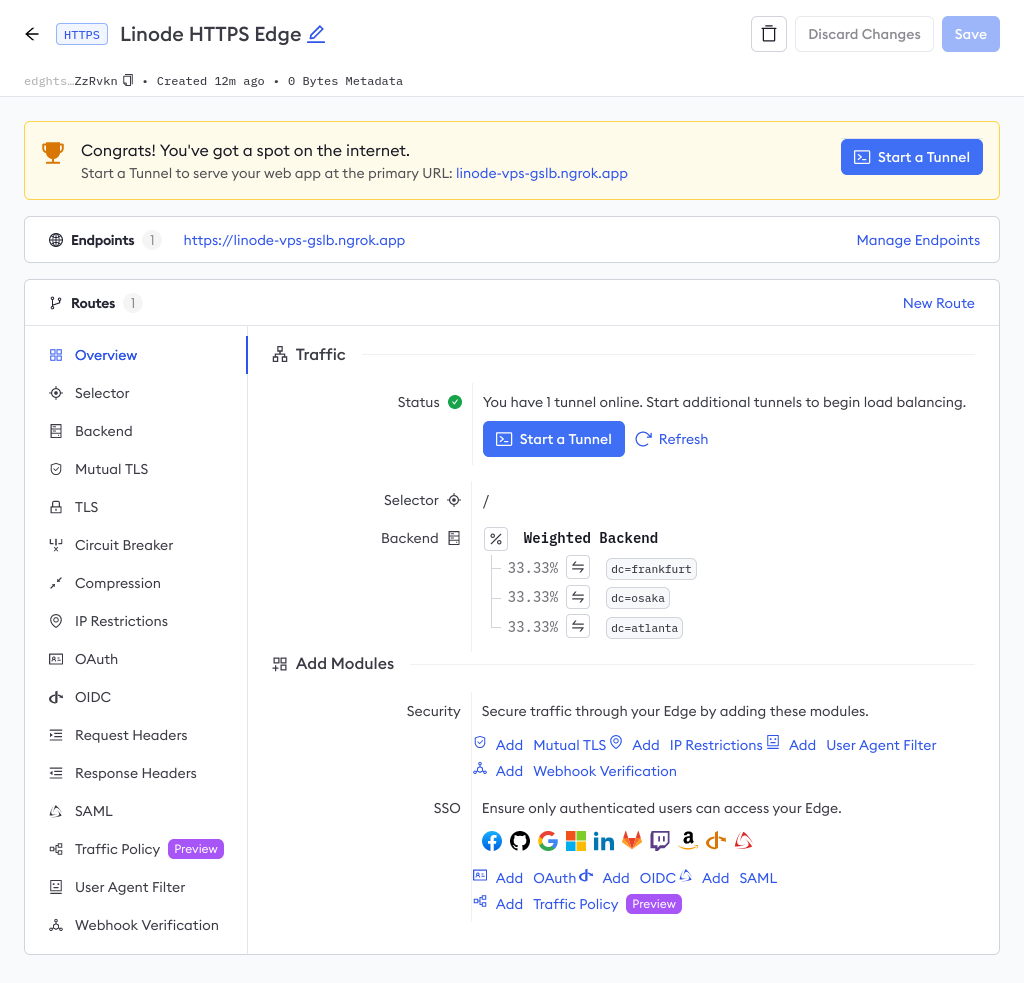
To confirm your global load balancing, head over to the Edges dashboard once again to confirm your tunnels are online and weighted equally at 33.33%.
Step 7 (optional): Enable the Traffic Policy module for API gateway features
Your demo API is already globally load-balanced, but if you want to extend your ngrok usage even further, you can enable one or more Traffic Policy modules on your Edge to control traffic or establish standards for how your upstream services are accessed.
You have two options:
-
Using
curlwith the ngrok API's/edges/https/{edge_id}/routes/{id}/policyendpoint. For this, you will need find theidof the catch-all Route you created in step 4.export ROUTE_ID=edghtsrt_...
curl \
-X PUT "https://api.ngrok.com/edges/https/${EDGE_ID}/routes/${ROUTE_ID}/policy" \
-H "Authorization: Bearer ${NGROK_API_KEY}" \
-H "Content-Type: application/json" \
-H "Ngrok-Version: 2" \
-d '{"enabled":true,"outbound":[{"actions":[{"type":"add-headers","config":{"headers": {"is-ngrok": "1","country": "${.ngrok.geo.country_code}"}}}],"name":"Add ngrok headers"}]}' -
In the Traffic Policy module section of your Edge in the ngrok dashboard, where you can click the Edit Traffic Policy button and add the YAML below.
inbound: []
outbound:
  - expressions: []
    name: Add ngrok headers
    actions:
      - type: add-headers
        config:
          headers:
            country: ${.ngrok.geo.country_code}
            is-ngrok: "1"
When you request your API again, the response includes the country (with the appropriate code for where you're generating said request) and is-ngrok headers.
curl -s -I -X GET https://<YOUR_NGROK_DOMAIN>/api

HTTP/2 200
content-type: application/json
country: US
date: Wed, 22 May 2024 14:53:42 GMT
is-ngrok: 1
content-length: 63
What's next?
You now have a globally load-balanced API deployment using three Linode VMs, three ngrok agents, three secure tunnels, one ngrok Edge, and a single convenient endpoint for your users.
From here, you have many options for extending your use of ngrok's GSLB:
- Spread the load from user requests further by creating additional deployments in more regions, adding a new Tunnel Group backend for each, and patching your Weighted Backend configuration.
- Add more VMs to a region with existing deployments and add them to the relevant Tunnel Group backend. Ngrok will then load-balance between those specific VMs equally after weighting requests on the Backend level.
- Alternatively, use NodeBalancers for
- Provision a Kubernetes cluster with the same workload and the ngrok Kubernetes Operator to load-balance between VM- and Kubernetes-based deployments of the same API or application.
- Use your Weighted Backend for A/B tests by changing your deployments between different regions and VMs.
If you're eager to learn more about ngrok's GSLB, give the following a read: